Creating an Upload Share
Upload Shares for Data Rooms or folders can be created in the file browser.
To create Upload Shares, a user must have the permission to “Create files and folders” for the corresponding Data Room.

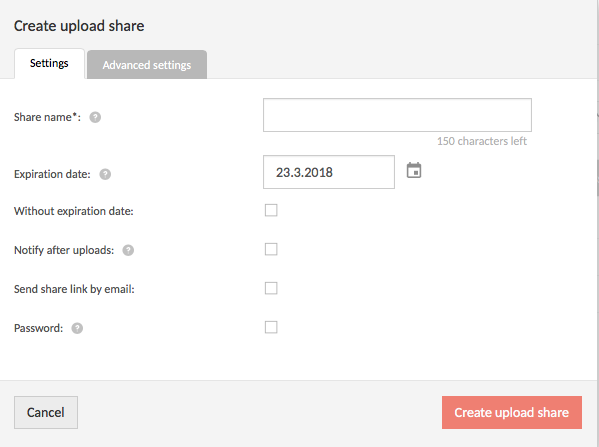
After clicking the Create upload share button, the following window will appear:
Share name
The share name can be chosen freely and denotes its purpose, in addition to ensuring a clear overview within the Data Space. The share name must be unique in the Data Space – if it is not, the user will be shown a corresponding warning.
Expiration date
By default, am expiration date is set for Upload Shares. This default time period (e.g. 4 weeks) can be defined in the system settings. The Upload Shares will automatically be removed after the expiration date and cannot be restored. The uploaded files themselves remain in DRACOON.
Without expiration date
This automatically disables the expiration date.
Notify on upload
When ticking this check box, you will receive a notification by email when someone uploads an item to the Upload Share.
Send share by email
When ticking this check box, you can send the link to the Upload Share directly to specific people by email. When activating this feature, three additional fields will appear, giving you further options for email notifications:
Send share to
Enter the email address of the recipients that are to receive a notification by email. Several email addresses can be entered by separating them with semicolons (e.g. peter@test.de; simon@example.de )
Subject
Enter the email’s subject in this field.
Your message
Enter a short comment in this field to give further information about the Upload Share.
Password
By choosing a password, the Upload Share will be protected and files can only be uploaded if the link recipient enters the correct password. The password chosen by you must be entered by the recipient on the upload page.
If this option isn’t selected, everyone on the Internet with access to the upload URL will be able to upload files!
When activating this feature, additional fields will appear prompting you to enter and verify the password you have chosen.

The password is not automatically sent by email and should instead reach the recipient by a different means of communication, e.g. by phone or chat.
The password must meet the following requirements:
- Be at least 8 characters long
- Include letters and numbers
If system-wide settings do not allow weak passwords, additional criteria must be met when choosing your password:
- Include at least one special character
- Include upper and lower-case letters
Advanced settings
The tab Advanced Settings gives you further options when creating an Upload shate.
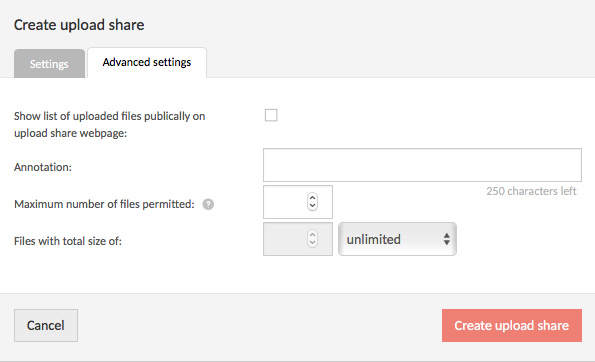
Show uploaded files
When ticking this checkbox, files which have already been uploaded to the Upload Share will be visible to everyone accessing the upload page.
Annotations
In this field, you can enter some comments which might be useful for the recipient of the Upload Share.
Maximum number of files permitted
This setting limits the number of files which can be uploaded to the Upload Share. If a limit has been set, the number of files which can still be uploaded will be visible on the upload page.
Files with total size of
Maximum collective total size of all files uploaded to the Upload Share. You can choose between GB, MB, and unlimited.
Once you create the Upload Share by clicking Create upload share, the following window will appear:
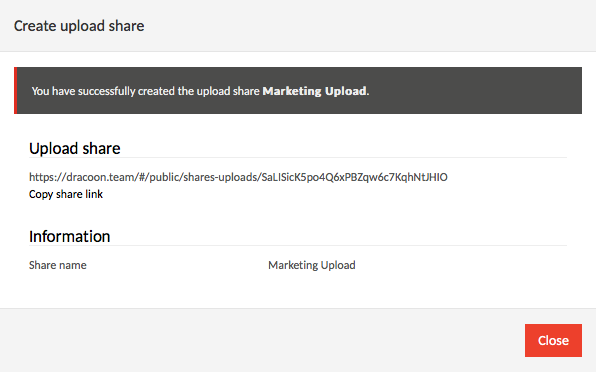
Download link
By clicking Copy link next to the displayed link, the link to the Upload Share is copied to your clipboard so that it can comfortably be pasted and used in other programs.
Information
In addition to the share name, this area displays the previously defined information, e.g. expiration date, notification settings, as well as maximum number of files permitted.
Viewing Upload Shares
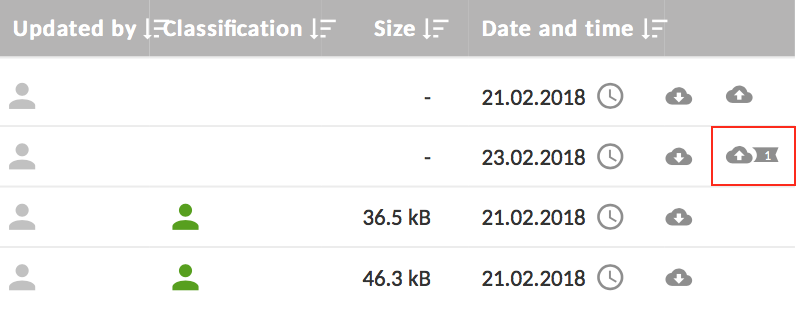
The number of active Upload Shares for Data Room, subordinate Data Room or folder is visible in the file browser directly behind the Share Link icon.
By clicking Download & Upload Shares and then My Upload Shares, you can view all Share Links you have created.

In addition to the share name, the following information is visible:
Created on
Date on which the Upload Share was created.
Expires on
The Upload Share's expiry date. The Upload Share, including all Upload Share settings, will automatically be removed after the expiration date and cannot be recovered. It will no longer be possible to upload files via the upload page. All uploaded files remain in DRACOON.
Settings
If these settings have been activated they will appear greyed out.
![]() The link to the Upload Share was sent by email.
The link to the Upload Share was sent by email.
![]() Email notifications are activated for uploads.
Email notifications are activated for uploads.
Hover over the email symbol with the mouse pointer to view a list of all email addresses to which the link was shared.
Actions
Here, the Upload Share can be deleted and the corresponding link can be copied to the clipboard or sent by email via the email program installed on your computer.
Similar to your own download links, a Data Space Admin can view the upload shares of all users via Download & Upload Shares - All Upload Shares. This page also indicates by which user the upload share was created.
Deleting Upload Shares
Share Links can be deleted by clicking Upload & Download Shares, My Upload Shares, and then Delete:
 The Upload Share, including all Upload Share settings, will automatically be removed after the expiration date and cannot be recovered. It will no longer be possible to upload files via the upload page. All uploaded files remain in DRACOON.
Sharing Upload Shares by mail
Upload Shares can be viewed by clicking Share Links & Upload SHares and then My Upload Shares. They can also retroactively be sent by email (through an installed email program).

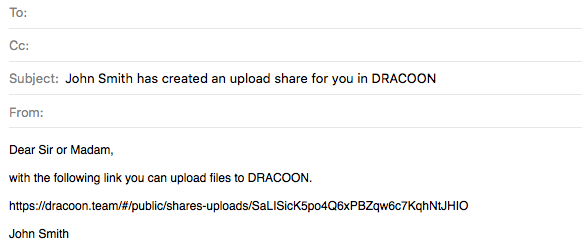
After clicking the “send by email” button , your computer’s email program will launch and enable you to send an email.
Comments
0 comments
Article is closed for comments.